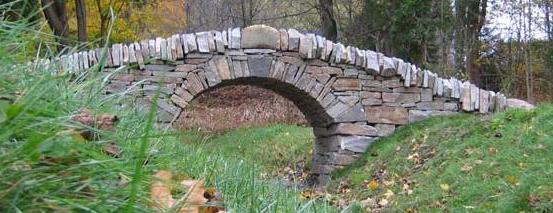
This photo shows a modern support for an arch. The blocks below the wood require to be placed on a solid base and be easily knocked away when the stonework is completed.

This feature was built as a tribute to Syd Mitchell by the Central Scotland branch of the DSWA. Syd had done great work as our secretary for several years.

This clapper bridge replaced an old wooden structure which tended to wash away with every flood. I chose the rocks out on the hill and they were brought down to the site by the big machine. The rocks were all about the same length so the two upright ones were thumped into the mud, the other three were then carefully placed to form the crossing. At the end of the morning the owner of the property came to inspect and commented that he really liked his bridge. I pointed out that in fact it was my bridge. At that, the window of the big machine opened and the driver said "Neither of you touched the stones it is my Bridge".
It just goes to show that when we say Sir Christopher Wren built St.Pauls Cathedral in London we should spare a thought for those who really did build it.
Key Points
A Foundations
B The Wings
C Former
D Building Stones
E Pinning (The Hedgehog)
F Parapet
G After Care
A Foundations
The best possible foundation is to use bedrock. Where this is sloping into the water, the sensible thing is to excavate so that the rock is flat or sloping at right angles away from the bank.
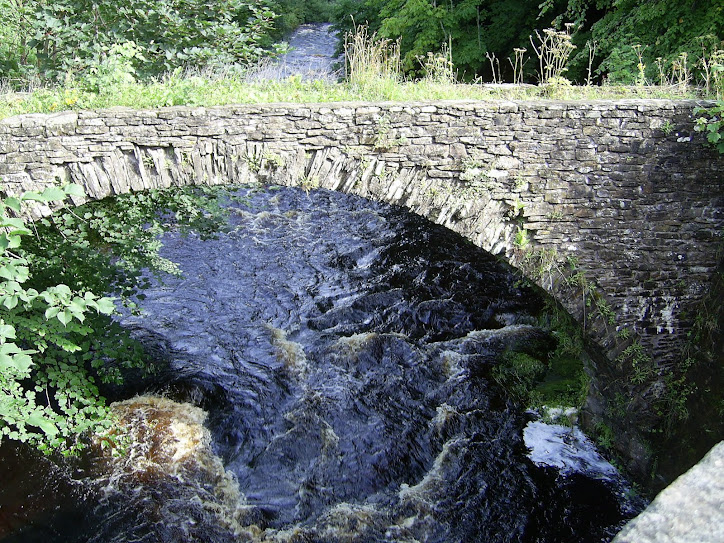
Where bedrock is not present then the largest flat top rocks available should be used. These should be set on solid material below the bed of the river. The pillars for the arch should also be built with the heaviest rocks available. While it may be tempting to use mortar on these supports, the advantage of dry build is that flood water flows through the gaps whereas a solid mortared block forms a dam which holds back the receding excess from the surrounding area.
B The Wings
Ideally the wings of a bridge should also be laid on bedrock or at least onto solid hard stand. It is important that the wings are not built up above the height of the pinning on the arch at each stage. It is aesthetically pleasing for the rock used for the wings to be the same as the arch stones. However when rough irregular rocks are used for the wings it may be necessary to use a different type of material for the arch which is more suitable for chiselling into the required shapes.
C Former
Prior to the 20th Century, the support for a new arch was called centring. The arrangement was similar to the technology involved in the construction of a wheel. Another method used for smaller arches was to pile sand on a wooden platform to create the desired shape for the stonework above. It was quite simple then to remove the loose sand when building was complete.
Nowadays it is much more common to cut the required shape on at least two boards then to cover these with strong cross pieces or with bendable strong materials such as marine ply. It is essential that the former of whatever type is strong enough to bear the weight of not just the arch rocks but also any material which will be built on top before the former is removed. Any area of weakness can result in failure.
The support for the former should be resting on a solid base. Bricks or blocks are ideal for the support as they can be easily knocked away when required.
Care is necessary when arranging these support so that the former can safely be dropped down to allow its removal, without interfering with the stone work. I have heard of people being required to set fire to the former to remove it as it was not possible to get it out any other way!
With a half moon former it is possible and useful when placing the arch stones to mark lines on the outside to indicate the required slope of the builders and especially the risers.
When the desired arch is not a half circle, the lines should be drawn from the theoretical centre.
D Building Stones
Once the supporting pillars are in place, the first rocks in the arch are the springers (or risers). These go from the flat bed to the angle as shown by the lines drawn on the faces of the former. As with each course, these have to be placed across the whole width of the arch on both sides of the gap.
The second course of stones is laid carefully on these springers also following the lines drawn. It is vital that the narrowest part of each builder is pointing downwards, otherwise they could fall out when the support is removed. However – it is important that the taper on each stone goes over the arch and not across the arch.
Each layer of builders is set from both sides all the way up the arch until the position for the keystone is reached. These are driven in to ensure tightness right across the whole arch.
Looking from underneath the final effect is of a coursed wall hanging above the viewer. As with a wall it is important to break the joints.
It is common practice to alternate the length of the voussoirs this is mainly stylistic but does make the fitting of courses into the arch trickier as many odd angles may be required to fill the gaps
E Pinning (The Hedgehog)
It is vital that several courses are completed before the start of the pinning. The reason for this is if there is insufficient weight on the building stone then the pinning may force them apart creating gaps in the final structure.
Each rock in the build has to be secure. Where necessary, the pins should be driven in to prevent any movement. Clearly the ideal fit is when the two stones are exactly flat surface against flat surface this is better for the durability of the bridge than pins. However where these are required they should also have their smallest face downwards. Often these pinning stones may be longer than the building stones and this can result in the effect of the hedgehog.
F Parapet
The traditional pack-horse dry stone bridge in the UK had no parapet.
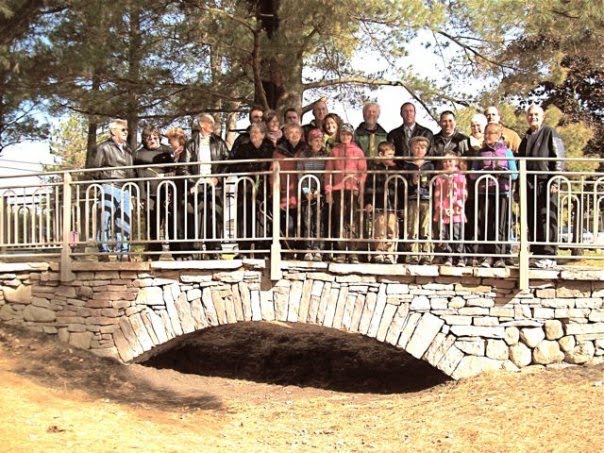
Probably the reason for this was that the bridge has to be considerably wider to allow a substantial wall on either side. In modern times it is a safety consideration to build some type of barrier at the edges. At least a single row of coping stones does give some sense of security. A metal railing can be used but in this case each upright should be fixed into single rocks rather than between two.
A mortared wall on top of a dry stone bridge may create problems as there may be some movement in the dry section which leads to cracking of the mortared part.
Bridge at Russel by John Shaw -Rimmington for the DSWAC
G After Care
As with all buildings but especially dry build, it is important to arrange for regular checks and where necessary maintenance must be attended to. Any structures with loose or missing stones tend to be considered neglected by the public and this can be a temptation for vandalism or for poor repairs to be carried out by well intentioned amateurs.
One problem with flash flooding can be that the foundations of a bridge are undermined by scouring when the flow of water is much faster than normally. One way to reduce this is to dump heavy rocks down stream. The effect is to create a slowing of the water under the bridge. As a result material tends to be deposited under the arch rather than scoured away.
Final Thought
Always remember that the durability of an arch depends on the strength of the weakest stone.
Feedback
Please let me know how you find this guide and I will be very grateful for helpful suggestions.


